

Microneedling Before and After: What Nobody Tells You First
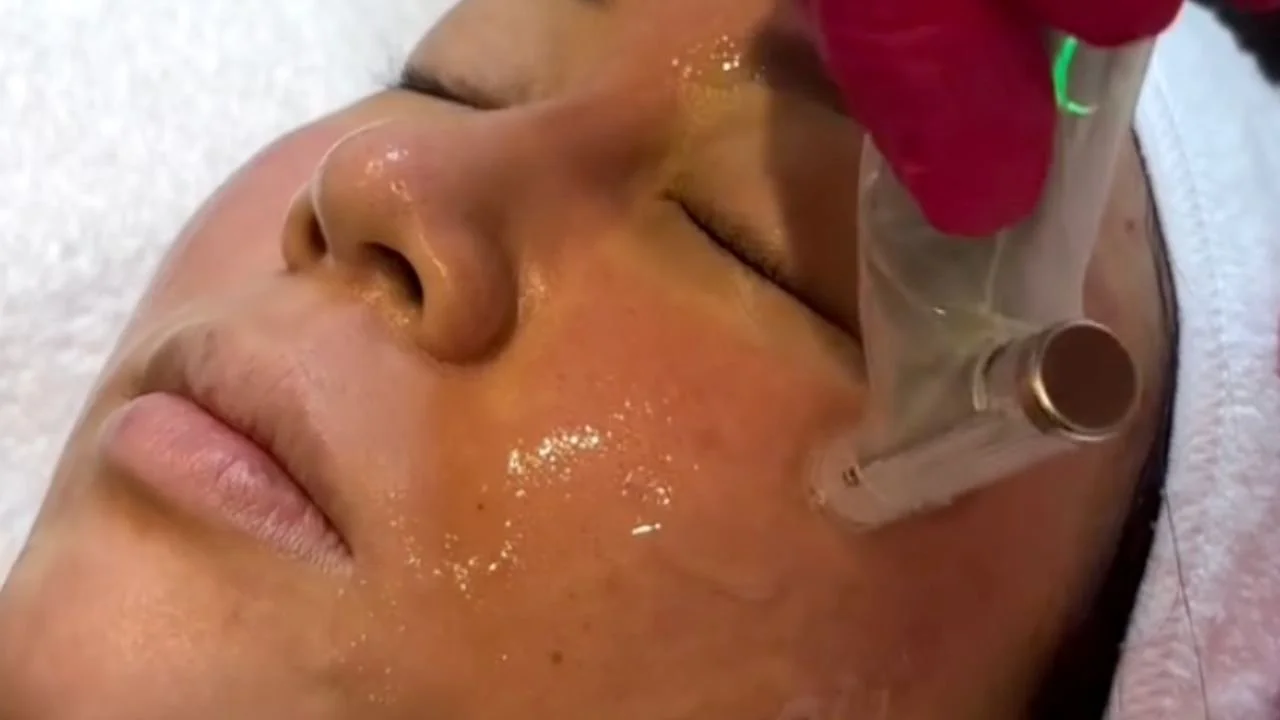
Most microneedling before and after galleries show you the transformation. They almost never show you what your skin looks like on day two, why results don’t peak until months after your last session, or what to put on your face the night after treatment to actually support the result. Those gaps are where most people’s expectations go wrong.
Microneedling works. Studies show up to 41 percent reduction in pore size after just two sessions and 50 to 75 percent improvement in atrophic acne scars after three to six sessions in controlled trials. But results depend on your skin concern, your skin type, the depth and technique used, how many sessions you complete, and whether your aftercare is actually supporting the process. None of that appears in a curated before-and-after photo.
This guide covers what those galleries skip: realistic results by concern, what to do before and after your appointment, a day-by-day healing timeline, the Morpheus8 vs standard comparison, how darker skin tones need to be approached differently, and how to maintain results between sessions. At Plump It Upp Medi Spa in Etobicoke, we approach microneedling with clinical precision and honest expectations.
What Microneedling Actually Does to Your Skin
Fine needles create thousands of controlled micro-injuries across the skin. Your body interprets these as wounds and responds by sending fibroblasts to the area, producing new collagen and elastin. Over weeks and months, this new structural protein improves texture, firmness, and tone from within. The procedure triggers wound healing without the recovery required by laser resurfacing.
Depth determines what you’re treating. Shallow passes at 0.25mm improve product absorption and superficial texture. Medium depths at 0.5mm to 1.5mm reach the dermis and stimulate meaningful collagen. Deeper passes at 1.5mm to 2.5mm address significant scarring. This is the fundamental difference between professional treatment and at-home devices, which operate too shallowly to produce structural change.
The collagen response takes time. Results don’t arrive on a linear schedule. The healing cascade peaks around weeks four to six. Collagen maturation continues for three to six months after each session. Before-and-after photos taken at week two significantly underrepresent the final outcome.
Microneedling Before and After: Results by Skin Concern
Skin Concern: Acne scars (atrophic)
Sessions Needed: 3 to 6
When Improvement Appears: Weeks 4 to 6, peak months 3 to 6
Realistic Outcome: 50 to 75% improvement in clinical trials
Skin Concern: Fine lines and wrinkles
Sessions Needed: 3 to 4
When Improvement Appears: Weeks 4 to 6 for texture, months 2 to 3 for depth
Realistic Outcome: Softening and firmness, not elimination
Skin Concern: Enlarged pores
Sessions Needed: 2 to 3
When Improvement Appears: 2 to 3 weeks initial
Realistic Outcome: Up to 41% pore reduction after 2 sessions
Skin Concern: Skin texture and dullness
Sessions Needed: 2 to 3
When Improvement Appears: 2 to 3 weeks
Realistic Outcome: Smoother, more even surface tone
Skin Concern: Hyperpigmentation (light skin)
Sessions Needed: 4 to 6 with protocols
When Improvement Appears: Gradual over months
Realistic Outcome: Variable, depends on pigment depth
Skin Concern: Hyperpigmentation (Fitzpatrick III-VI)
Sessions Needed: Specialist protocol required
When Improvement Appears: Slower, careful management needed
Realistic Outcome: Possible but PIH risk without expert care
Skin Concern: Stretch marks
Sessions Needed: 4 to 8
When Improvement Appears: Months 3 to 6
Realistic Outcome: Visible fading, not full removal
Skin Concern: Rosacea
Sessions Needed: 3 to 5
When Improvement Appears: Gradual reduction over months
Realistic Outcome: Reduced redness, improved resilience
The hyperpigmentation rows need specific attention. Results vary significantly based on skin type. Fitzpatrick III-VI patients face a genuine risk of post-inflammatory hyperpigmentation from microneedling if protocols aren’t carefully managed. The micro-injuries that stimulate collagen can also trigger melanin production in darker skin, worsening pigmentation rather than improving it. This is addressed in its own section below.
What to Expect After Session 1, 3, and a Full Course
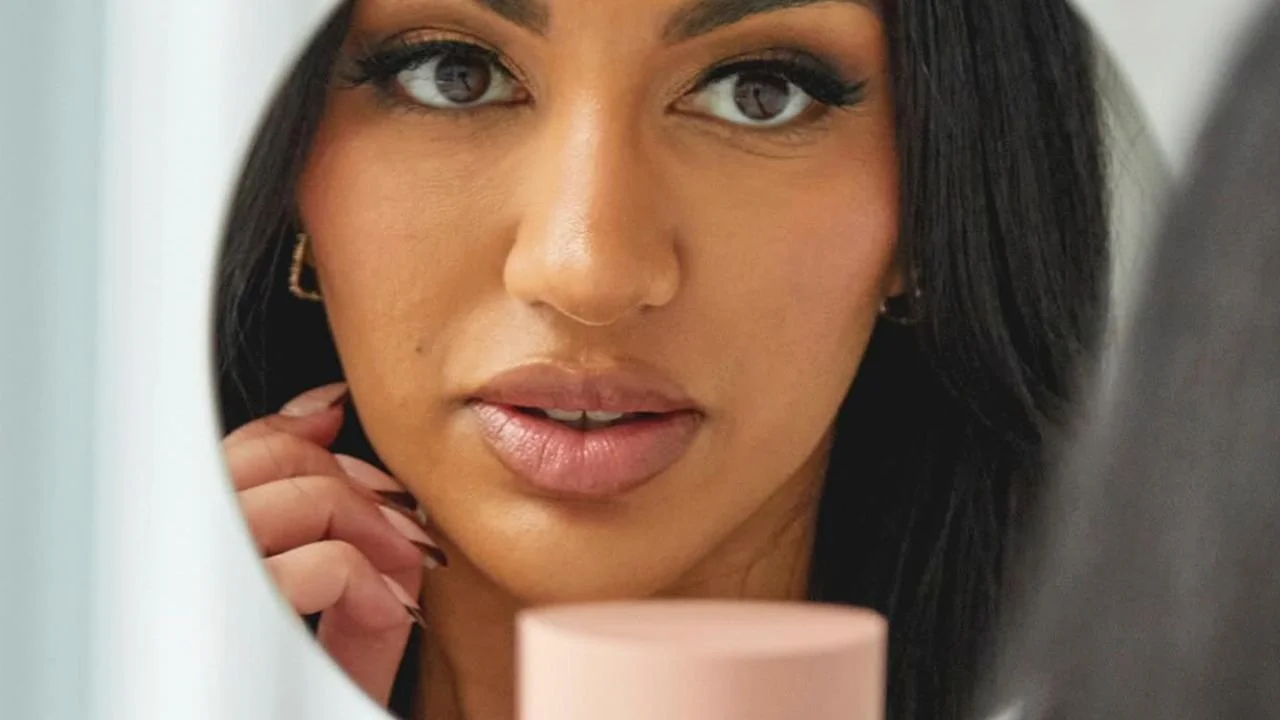
This is the question most people Google mid-treatment when they’re not sure if things are working. The honest answer is that a single session produces mild improvement. The structural results come from cumulative sessions. Giving up after one or two sessions is one of the most common reasons people feel disappointed with microneedling.
After Session: Session 1
What Most Patients Notice: Skin looks brighter within 2 to 3 weeks. Texture slightly smoother.
What’s Happening Inside: Initial collagen response beginning. Inflammation cascade resolved.
After Session: Session 2
What Most Patients Notice: More noticeable improvement in pore size and tone. Scars may start softening.
What’s Happening Inside: Cumulative collagen build. Remodeling is more established.
After Session: Session 3
What Most Patients Notice: Visible improvement across most concerns. Texture changes now clear.
What’s Happening Inside: Peak of early-stage collagen response across treated areas.
After Session: Full course (4 to 6 sessions)
What Most Patients Notice: Significant structural improvement. Scars softer, skin firmer.
What’s Happening Inside: Deep collagen remodelling. New elastin integrating.
After Session: Months 3 to 6 post-course
What Most Patients Notice: Best results visible. Skin quality continues improving.
What’s Happening Inside: Collagen maturation complete. Structural changes fully expressed.
The months 3 to 6 row is the most important for setting expectations. This is when before-and-after photos are typically taken, and it’s genuinely when the results are at their best. If you compare your skin at week two to the same day your friend’s photo was taken at month five, you’re not comparing the same thing. Complete the recommended course and then assess. The final result hasn’t arrived yet at week two.
What to Do Before Your Microneedling Appointment
This is the section most clinics forget to give you until you are in the chair. Preparation significantly affects both the safety of the treatment and the quality of the result. If you’re using retinoids, AHAs, or active skincare, what you stop and when matters.
Timeframe: 2 weeks before
What to Stop or Start: Stop isotretinoin (Accutane) if recently used — ideally 6 months wait
Why: Skin healing is altered, risk of scarring
Timeframe: 1 week before
What to Stop or Start: Stop retinoids (tretinoin, retinol), AHAs, BHAs, vitamin C serums
Why: Skin already sensitised, needling increases irritation risk
Timeframe: 5 days before
What to Stop or Start: Stop waxing, threading, or hair removal in treatment area
Why: Skin trauma before needling increases risk
Timeframe: 48 hours before
What to Stop or Start: Avoid active sunburn or excessive sun exposure
Why: Inflamed skin should not be needled
Timeframe: Day before
What to Stop or Start: No alcohol (increases bleeding and inflammation)
Why: Vasodilation worsens post-treatment response
Timeframe: Day of treatment
What to Stop or Start: Arrive with clean skin, no makeup
Why: Products interfere with sterile field and serum infusion
Timeframe: Disclose at consultation
What to Stop or Start: Blood thinners, cold sore history, skin conditions, recent fillers
Why: Affects safety protocol and timing
The retinoid row is the one that surprises most people. Tretinoin, retinol, and similar activities accelerate skin cell turnover and make the skin more sensitive. Using them right up to your appointment and then having needles pass across that sensitised skin creates more inflammation than necessary and can trigger PIH, particularly in darker skin tones. One week off is the standard guidance.
Disclosing a history of cold sores is essential. Microneedling in the perioral area can trigger a herpes simplex reactivation. Antiviral pre-treatment is required if you have this history. This applies whether you’re having standard microneedling or Morpheus8 around the mouth area. If you mention it at the consultation, the protocol adjusts. If you don’t, the risk is entirely avoidable.
What to Put on Your Skin After Microneedling

The microchannels created by microneedling significantly increase how deeply products penetrate. This is an advantage and a risk. Applied correctly, active serums reach the dermis at a depth they never achieve through normal application. Applied incorrectly, irritating ingredients reach sensitive tissue and cause inflammation, breakouts, or PIH.
Phase: First 24 hours
What to Use: Gentle saline mist, pure hyaluronic acid serum, prescribed growth factor serum
What to Avoid: Retinoids, AHAs, BHAs, vitamin C, niacinamide
Why: Microchannels are open. Active ingredients cause irritation or PIH
Phase: 24 to 48 hours
What to Use: Fragrance-free gentle moisturiser, continue HA serum
What to Avoid: Makeup if possible, heavy occlusive products
Why: Skin still sensitised and slightly inflamed
Phase: 48 to 72 hours
What to Use: Medical-grade SPF (non-negotiable), continue HA
What to Avoid: Vigorous exercise, extreme heat, alcohol on skin
Why: UV exposure post-needling increases pigmentation risk significantly
Phase: Day 4 to 7
What to Use: Gentle cleanser resumes, HA serum continues
What to Avoid: Retinoids and actives still on hold
Why: Skin surface recovering, not ready for actives
Phase: Week 2 onward
What to Use: Gradually reintroduce vitamin C then retinoids
What to Avoid: Rapid reintroduction of multiple actives at once
Why: Slow return prevents irritation and maximises results
Phase: Month 1+
What to Use: Maintain SPF daily, Alumier MD protocol if prescribed
What to Avoid: Skipping SPF even on cloudy days
Why: Sun exposure degrades new collagen and reverses results
The SPF row in the month one column is the non-negotiable one. New collagen forming beneath freshly needled skin is more vulnerable to UV-induced degradation than established collagen. Patients who skip sunscreen after microneedling are actively undoing the treatment they paid for. This isn’t a minor suggestion. It’s the single most important thing you can do to protect and extend your results.
At Plump It Upp we use Alumier MD medical-grade skincare as the post-treatment protocol, including their formulations safe for Fitzpatrick III-VI skin tones. If you’re considering microneedling and don’t have a post-treatment skincare plan, building one is part of what we do at the consultation.More about our facial treatment approach at Plump It Upp.
Day by Day: The Healing Timeline Nobody Shows You
Day / Week: Day 1
What You Typically See: Redness, warmth, sunburn sensation
What’s Normal: Skin in active inflammatory phase
Day / Week: Day 2
What You Typically See: Redness fading, skin dry and tight
What’s Normal: Still sensitive, hold all actives
Day / Week: Day 3 to 4
What You Typically See: Redness mostly gone, possible flaking
What’s Normal: Old cells shedding as new surface forms
Day / Week: Day 5 to 7
What You Typically See: Skin looking cleaner and brighter
What’s Normal: Early texture improvement visible
Day / Week: Week 2 to 3
What You Typically See: Smoother feel, pores looking smaller
What’s Normal: Collagen response underway
Day / Week: Week 4 to 6
What You Typically See: Visible improvement in tone and texture
What’s Normal: Most noticeable change from first session
Day / Week: Month 3 to 6
What You Typically See: Continued remodelling beneath the surface
What’s Normal: Best results typically appear here
Day two is when most patients worry. The skin can look more inflamed than the day of treatment as the inflammatory response peaks. This is completely normal. It’s your body doing exactly what produces the result. Reaching for active products to deal with the redness or applying heavy makeup at this stage can interfere with healing. The best thing to do on day two is gentle hyaluronic acid, SPF, and leave the skin alone.
The month three to six window is where genuine structural results live. If your clinic takes before-and-after photos at week one and shows them to you as your result, those are not your result. The result is at month four. Patience is not passive waiting. It’s how the treatment works.
Morpheus8 vs Standard Microneedling: Which Is Right for You?
These are genuinely different treatments at different depth, cost, and downtime profiles. Standard microneedling uses mechanical needles only. Morpheus8 adds radiofrequency energy through the same needles, delivering heat deep into the dermis and subdermal layer. The depth difference is significant: up to 2.5mm versus up to 8mm changes what’s being treated.
Factor: Mechanism
Standard Microneedling: Mechanical micro-injuries only
Morpheus8 (RF Microneedling): Micro-injuries plus radiofrequency energy at depth
Factor: Needle depth
Standard Microneedling: 0.5mm to 2.5mm
Morpheus8 (RF Microneedling): Up to 8mm into subdermal layer
Factor: Skin tightening
Standard Microneedling: Mild to moderate
Morpheus8 (RF Microneedling): Significant deep tightening
Factor: Sessions needed
Standard Microneedling: 3 to 6
Morpheus8 (RF Microneedling): 1 to 3
Factor: Downtime
Standard Microneedling: 1 to 3 days
Morpheus8 (RF Microneedling): 3 to 5 days
Factor: Best for
Standard Microneedling: Texture, pores, fine lines, mild scars
Morpheus8 (RF Microneedling): Laxity, deeper scars, body tightening
Factor: Cost per session (CAD)
Standard Microneedling: $300 to $600
Morpheus8 (RF Microneedling): $800 to $1,500
For patients with skin laxity, jowling, or concerns requiring deep structural remodelling, Morpheus8’s RF component reaches tissue that standard needling cannot. For texture, pores, and mild scarring, standard microneedling at the right depth produces excellent results with less cost and less downtime. The consultation determines which is appropriate for your specific anatomy and concerns.
Combining Microneedling With Other Treatments
Microneedling works well as a standalone treatment. It works even better when combined strategically with other modalities. The open microchannels created during needling make the treated tissue more receptive to what’s delivered immediately after. Growth factors, hyaluronic acid, and prescription serums penetrate significantly deeper through those channels than through intact skin.
Combination: Microneedling + PRF
What Each Adds: Growth factors delivered into microchannels immediately after needling
Best For: Acne scars, overall skin quality, under-eye area
Combination: Microneedling + topical vitamin C (next day)
What Each Adds: Antioxidant supports collagen synthesis during healing
Best For: Pigmentation, dullness, fine lines
Combination: Morpheus8 + Dysport
What Each Adds: RF tightening + muscle relaxation for full lower face or forehead
Best For: Laxity plus dynamic lines in the same area
Combination: Microneedling + Alumier MD retinol (week 2+)
What Each Adds: Medical-grade retinoid accelerates cell turnover in healing phase
Best For: Acne scars, texture, anti-aging maintenance
Combination: Microneedling + hyaluronic acid serum (same day)
What Each Adds: Channels carry HA deeper than topical application
Best For: Hydration, plumpness, barrier repair
Combination: Morpheus8 + Radiesse
What Each Adds: Deep RF tightening + biostimulator for structural collagen
Best For: Advanced laxity, jowls, neck, jawline
PRF (platelet-rich fibrin) is the most evidence-backed add-on for microneedling. Your own blood is centrifuged to concentrate platelets and growth factors, which are then applied to the skin immediately after needling or injected into the treated area. The growth factors directly support the collagen response triggered by the needling. For acne scarring specifically, microneedling plus PRF consistently produces better outcomes than either treatment alone.
For patients with more advanced signs of facial aging, the Morpheus8 plus Radiesse combination often provides the most comprehensive improvement.. Morpheus8 creates deep tightening through RF energy. Radiesse adds volume and stimulates collagen simultaneously. Used together, they address laxity, volume loss, and skin quality in a single treatment plan. For patients in their late forties or fifties with significant facial changes, this pairing offers structural improvement that approaches what used to require surgical consultation.
Microneedling on Darker Skin: What You Need to Know
The blanket claim that microneedling is safe for all skin tones is technically accurate but practically incomplete. The same protocol applied to Fitzpatrick VI skin that works well on Fitzpatrick II skin is not appropriate, and the risk of triggering post-inflammatory hyperpigmentation without specialist management is real.
Fitzpatrick Type: I to II
Skin Description: Fair, burns easily
PIH Risk: Low
Protocol Notes: Standard protocol, predictable results
Fitzpatrick Type: III
Skin Description: Medium, sometimes burns
PIH Risk: Low to moderate
Protocol Notes: Pre-treat with tyrosinase inhibitors if pigmentation present
Fitzpatrick Type: IV
Skin Description: Olive, rarely burns
PIH Risk: Moderate
Protocol Notes: Conservative depth, extended spacing between sessions
Fitzpatrick Type: V
Skin Description: Brown, rarely burns
PIH Risk: Moderate to high
Protocol Notes: Specialist required, SPF non-negotiable post-treatment
Fitzpatrick Type: VI
Skin Description: Dark brown to black
PIH Risk: Highest
Protocol Notes: Specialist essential, PIH is a real risk without correct protocol
The right approach for Fitzpatrick III-VI includes pre-treatment with tyrosinase inhibitors to suppress melanin production before the session, conservative needle depth to minimise inflammatory trigger, extended spacing between sessions, medical-grade SPF as a non-negotiable step from day one of recovery, and a provider who has demonstrable experience with this patient population, not just a generic claim of being inclusive.
At Plump It Upp in Etobicoke, approximately 30 percent of clients have Fitzpatrick III-VI skin tones. This isn’t an afterthought. It’s built into how we plan every microneedling appointment for those clients. If you’ve been hesitant about microneedling because of concerns about your skin tone, that hesitation is valid and worth discussing at a consultation.Plump It Upp’s approach to skin-inclusive treatments.
Professional vs At-Home Microneedling: The Honest Comparison
Factor: Depth
Professional: 0.5mm to 2.5mm
At-Home: Usually 0.25mm
Factor: Collagen stimulation
Professional: Significant at correct depth
At-Home: Minimal, primarily product absorption
Factor: Sterility
Professional: Medical-grade, single-use
At-Home: Variable
Factor: PIH risk (darker skin)
Professional: Managed with protocols
At-Home: Higher without expertise
Factor: Cost
Professional: $300 to $1,500 per session
At-Home: $30 to $150 device
Factor: Best role
Professional: Primary treatment
At-Home: Maintenance between professional sessions
At-home rollers at 0.25mm primarily improve product absorption. They don’t stimulate meaningful collagen at that depth. Used consistently between professional sessions, they’re a useful maintenance tool. Used as a replacement for professional treatment, they produce noticeably less clinical change and carry higher risk for patients with darker skin who don’t have an expert managing the protocol.
How to Maintain Your Microneedling Results
Completing a course of sessions is the beginning, not the end. Collagen continues degrading with age, UV exposure, and lifestyle factors. Microneedling results are long-lasting compared to some treatments but they’re not permanent. Maintenance sessions, spaced appropriately for your concern, extend and refresh results.
Goal: Acne scars (ongoing)
Spacing: 4 to 6 weeks during course, then every 3 to 4 months maintenance
At-Home Support: 0.25mm roller between sessions for product absorption
When to Book Touchup: When scars start to feel less soft, typically 3 to 4 months post-course
Goal: Skin texture and pores
Spacing: 4 to 6 weeks during course, then every 3 to 6 months
At-Home Support: Gentle roller once weekly if advised
When to Book Touchup: Seasonal refresh, once or twice a year
Goal: Anti-aging maintenance
Spacing: 4 to 6 weeks during course, then every 4 to 6 months
At-Home Support: Medical-grade skincare (Alumier retinol, SPF daily)
When to Book Touchup: When collagen results feel like they’re plateauing
Goal: Morpheus8 maintenance
Spacing: 3 months minimum between sessions
At-Home Support: Morpheus8 paired with daily SPF and retinol from week 2
When to Book Touchup: Every 12 to 18 months for most patients
Daily SPF is the single most impactful thing you can do to protect your microneedling investment between professional sessions. UV exposure degrades new collagen faster than almost any other environmental factor. Patients who are consistent with medical-grade SPF maintain their results significantly longer than those who aren’t.
At-home rollers between professional sessions serve a specific purpose: keeping the skin slightly more receptive to the serums in your home protocol. They don’t replicate clinical depth. But at 0.25mm, used once weekly on healed, healthy skin, they extend the benefits of each professional session and keep product penetration optimised. Ask at your follow-up appointment whether this fits your skin’s current state.
Microneedling Cost in Toronto: What to Budget
Treatment: Standard microneedling (face)
Cost Per Session (CAD): $300 to $600
Sessions Recommended: 3 to 6
Course Total: $900 to $3,600
Treatment: Morpheus8 (face)
Cost Per Session (CAD): $800 to $1,500
Sessions Recommended: 1 to 3
Course Total: $800 to $4,500
Treatment: Morpheus8 (body)
Cost Per Session (CAD): $1,000 to $2,000
Sessions Recommended: 2 to 4
Course Total: $2,000 to $8,000
Treatment: Microneedling + PRF
Cost Per Session (CAD): $500 to $800
Sessions Recommended: 3 to 4
Course Total: $1,500 to $3,200
Treatment: Microneedling + serum
Cost Per Session (CAD): $350 to $650
Sessions Recommended: 3 to 6
Course Total: $1,050 to $3,900
Per-session cost is not the most useful number for budgeting microneedling. The course cost reflects what you’re actually likely to invest for the outcome you’re looking for. A single session is rarely sufficient for significant concerns. Three sessions at $400 produces a different clinical result than six sessions, and the final two sessions are often where the most meaningful structural improvement occurs.
A consultation at Plump It Upp Medi Spa in Etobicoke gives you a specific treatment plan, session count, and cost before you commit to anything. We don’t recommend a single session when a course is what your skin actually needs.
Who Microneedling Is Not Right For
Situation: Active acne breakouts in treatment area
Why: Can spread bacteria, worsen inflammation
Situation: Active cold sore or herpes simplex
Why: Can trigger a flare, antiviral pre-treatment required
Situation: Blood thinning medications
Why: Increased bleeding at needle sites
Situation: Recent isotretinoin (Accutane)
Why: Wait at least 6 months after completing course
Situation: Pregnancy
Why: Not recommended
Situation: Fitzpatrick III-VI without specialist protocol
Why: PIH risk is significant without appropriate management
The Accutane row is the one that surprises people most. Isotretinoin fundamentally changes how the skin heals and responds to injury for months after you stop taking it. The standard waiting period is six months post-course. Disclosing this at your consultation is essential. A clinic that doesn’t ask about this at intake is missing a basic safety check.
Microneedling before and after results are real and the clinical evidence is genuinely good. What the galleries skip is the protocol behind those results: the right session count, the right aftercare, the right maintenance, and for patients with darker skin, the right specialist. Getting those things right is what separates a satisfying outcome from six weeks of inflammation with nothing to show for it.A consultation at Plump It Upp Medi Spa in Etobicoke is where your specific protocol starts.
The question worth asking before you book anywhere: does the clinic know your skin type, your history, and your aftercare plan before they hand you a treatment agreement?
FAQs
When do microneedling results appear?
Initial improvements in pore size and texture appear within 2 to 3 weeks of the first session. The most significant structural results develop between months 3 and 6 after a full course, when collagen remodelling is at its peak. Before-and-after photos taken at week two significantly underrepresent the final outcome. If you’re assessing results mid-treatment, wait until after the full course plus three months.
How many sessions do I need?
It depends on the concern. Enlarged pores and surface texture typically respond in 2 to 3 sessions. Acne scars usually need 3 to 6. Morpheus8 for laxity often requires 1 to 3. Sessions are spaced 4 to 6 weeks apart to allow the collagen response from each session to develop before adding the next.
What should I put on my skin right after microneedling?
First 24 hours: gentle hyaluronic acid serum, prescribed growth factor serum if provided, nothing else. Avoid retinoids, AHAs, BHAs, vitamin C, and niacinamide for at least 72 hours. Medical-grade SPF from day one post-treatment is non-negotiable. Reintroduce active products gradually from week two onward. The microchannels allow deeper penetration, which means irritating ingredients cause proportionally more irritation.
What should I stop before microneedling?
Stop retinoids one week before. Stop AHAs and BHAs one week before. Stop vitamin C serums five to seven days before. Avoid alcohol 48 hours before. Avoid sun exposure and waxing in the treatment area the week before. Disclose any history of cold sores, blood-thinning medications, or recent isotretinoin use at the consultation.
Is microneedling safe for darker skin?
Yes, with the right protocol. Fitzpatrick III-VI skin types require specific pre-treatment preparation, conservative needle depth, extended session spacing, and strict post-treatment SPF. Without these adjustments, the risk of post-inflammatory hyperpigmentation is real. Choose a clinic with demonstrated experience in this patient population, not just a general claim of being skin-tone inclusive.
What’s the difference between Morpheus8 and standard microneedling?
Standard microneedling uses mechanical needles to 2.5mm depth. Morpheus8 adds radiofrequency energy through the same needles, reaching up to 8mm. This depth difference makes Morpheus8 significantly more effective for skin laxity and deep structural remodelling. Standard microneedling is better suited to surface texture, pores, and mild scarring at lower cost and shorter downtime.
How long do microneedling results last?
With proper maintenance, results from a full course can last 12 to 18 months or longer. Daily SPF is the single biggest factor in how long results last. UV exposure degrades new collagen faster than most lifestyle factors. Maintenance sessions every 3 to 6 months for texture concerns, or every 12 to 18 months for Morpheus8, extend results significantly compared to one course with no follow-up.
Can I combine microneedling with other treatments?
Yes, and many concerns respond better to combination approaches. PRF added to microneedling delivers growth factors through the open channels and significantly improves acne scar outcomes. Hyaluronic acid serum applied immediately after penetrates dramatically deeper than through intact skin. Morpheus8 combined with Radiesse addresses both laxity and volume loss in a single treatment plan. Your provider can advise which combinations are appropriate for your specific concerns.
How do I maintain microneedling results?
Daily medical-grade SPF is the most impactful maintenance step. Between professional sessions, at-home 0.25mm rollers used once weekly on healed skin can extend the benefits of each session by improving product penetration. Maintenance sessions every 3 to 6 months for texture concerns, or 12 to 18 months for Morpheus8, keep results from regressing. A consistent medical-grade skincare protocol between appointments is the other primary factor.
Is at-home microneedling worth it?
As maintenance between professional sessions, yes. As a replacement for professional treatment, no. At-home devices operate at 0.25mm, which improves product absorption but doesn’t stimulate meaningful collagen. For Fitzpatrick III-VI patients without expert management, at-home needling carries higher PIH risk. Use it as a complement to professional treatment, not a substitute.